Linking Documents within CMMS
Note: Please see the
folder and file structure needed on the share drive for your
site/department.
1.
S:\maintXXX or
S:\ILS
2.
MaintXXX should
have a folder for the following: Pcard, Shippers, & Receipts. ILS will have a folder for RMA & Quote.
o
The “Receipts”
folder will hold all Receiving documents for site to site transfers and
receipts from a vendor.
3.
Under each folder
you should have folders by “Year”.
Within the “Year” folder you should have folders for each month.
4.
Use the naming
convention below to save the document into the corresponding folder.
Here
is an example S:\maintsuu\Receipts\2011\Receipts 2011-01{Jan}
Note: Use the naming
convention below for each of the items you link within the Item Request or
Acquisition Document.
Documents you may link to
an Item Request.
P-Card
Form
– PCARD_IR_XXXXX
Shipper
Form
– Shipper_IR_XXXXX (Used for transfers from site
to site)
Receiving
Document – Receive_IR_XXXXX
(Used for transfers from site to site)
Documents you may link to
an Acquisition Document.
Acquisition
Document Receipt – Receipt_AD_XXXXXXXXXXX
Return
Merchandise Authorization Number – RMA_AD_XXXXXXXXXXX
Quote –
Quote_AD_XXXXXXXXXXX
Note:
If
you have more than one to link to an IR/AD please use a _01, _02, etc. (i.e. Receipt_AD_XXXXXXXXXXX_01)
1.
To associate any
of these with the Item Request or an Acquisition Document you should be in the
corresponding module.

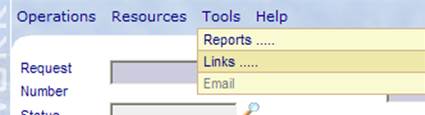
2.
Click on the Tools
menu and then the Links command as shown above, then click on the add New Link ![]() icon in
the Create / Edit / View Links window.
icon in
the Create / Edit / View Links window.

3.
Next, Enter the
IR/AD Title (This should be done by using the naming convention above), Description
and Data Division as shown below. Use
the Lookup ![]() icon and
set the Data Division to the specific Data Division Category for the Site.
icon and
set the Data Division to the specific Data Division Category for the Site.
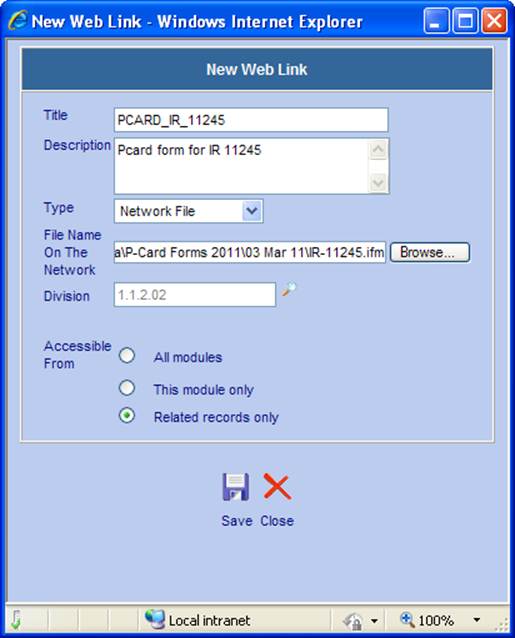
4.
Use the “Type”
selection window and set Type = Network File.
Use the Browse ![]() button to
access the network file server and go to the applicable IR/AD file stored on
the network file server as shown above.
button to
access the network file server and go to the applicable IR/AD file stored on
the network file server as shown above.
5.
Set the
“Accessible From” radio button to “Related records only” as shown above.
6.
Once you have
filled in all fields and selected the correct radio button, the file can be
saved.
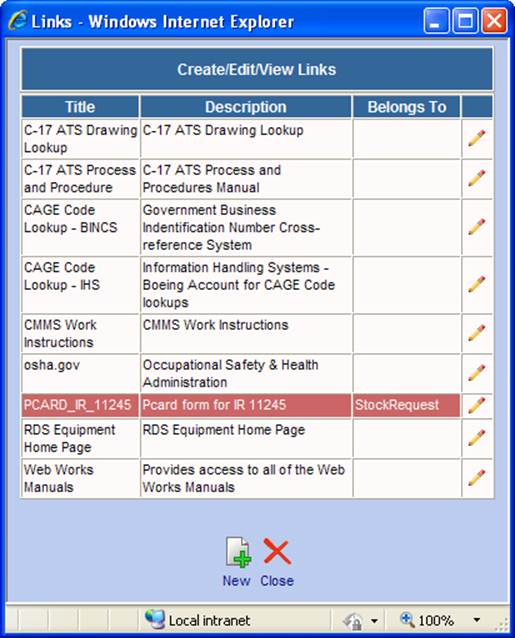
7.
After saving the
document it will be linked to the appropriate IR/AD and you will see it linked
in the Create/Edit/View Links window.
If you select it, it will open the document in a separate window.